1/12/2019
One of the deepest, darkest rabbit holes I’ve ever been down was the dissociating adventure of answering the question, ” What’s a Lumen?” I first asked myself this question whilst shopping for some Infra-Red and Ultra-Violet colored LEDs. Typically, while comparing LEDs, one would compare Lumens for a general sense of how powerful or bright an LED is, as well as how efficient it is. Every single IR and UV LED i found stated 0 Lumens. I immediately realized I don’t know what a Lumen fundamentally is, and that what I thought a lumen was, is not close or accurate at all.
During my research, I acquired some Infra-Red LEDs and wanted to make a project using them. I discovered that there is not much of a difference between normal White LEDs and UV/IR LEDs, and the most obvious difference is actually the fact that human eyeballs cannot see UV/IR light like they can see white light.

To humans, the difference between 3 watts of normal light and 3 watts of Infrared seems like night and day(literally?). But in an arbitrary sense, there is very little difference. I wanted to create something that highlighted and exploited this stark difference between human perception and the broader physical world.
How could i highlight and prove this stark phenomenon to people? Well, i know i can kind of convert the IR light to a visible color via a screen, so maybe i can do something with the concept of night vision.
I did some research on digital cameras and IR/UV light and found out that in order to take photographs that better reflect the humans view of them, camera makers put filters in cameras so that like human creators, cameras cannot see IR or UV light.
If i could remove the Infrared filter, the camera would then be able to pick up IR light. That means i could have a high powered IR light a scene, and it would be super bright to the camera, but nearly pitch black to a person.
_______________________________________________________________________________________
I needed to start with a digital camera, that has a live viewing screen. I hopped onto eBay and realized there are is an abundance of old, used digital cameras with screens. I did quick research about what models had the biggest and brightest screens and searched for those on ebay. I bid on the first one i saw that was ending the soonest. I scored it for a measly $12 and it shipped for a comical $3.75
When my Nikon Coolpix L22 arrived, I opened it up, popped 2 AA batteries in, and turned it on. Holding it in my hand, hearing the start up sounds, and looking at the outdated pixel screen gave me a tiny rush of nostalgia. I remembered how like every girl used to have a digital camera, like they had purses. And there was always one friend who just dropped photo dumps all the time.
I found a guide for removing the IR filter of a similar model camera. I read through it to get a good idea of the parts ill be looking at and taking apart, as well as any warnings or tips the writer may have shared.
The general idea is that you need to open the camera to get access to right behind the lens. because the IR filter is a small piece of plastic that sits flush against the back of the lens. This is the thing i need to remove to turn this plain camera into a ~Night Vision~ Camera.
The biggest risks are,
- Frying an electrical component by discharging static electricity.
- I wore wrist grounding straps to avoid this
- Accidentally shorting the Flash capacitor to somewhere it shouldn’t. This can be easily don on accident by touching two things with a screw or metal screwdriver i was using.
- to avoid this, I removed the batteries, and discharged the flash capacitor by connecting it to ground as soon as I saw the pins exposed.
- A small amount of soldering is required, so there’s a risk of shorting something but i wasn’t too worried. It was just a few wires.
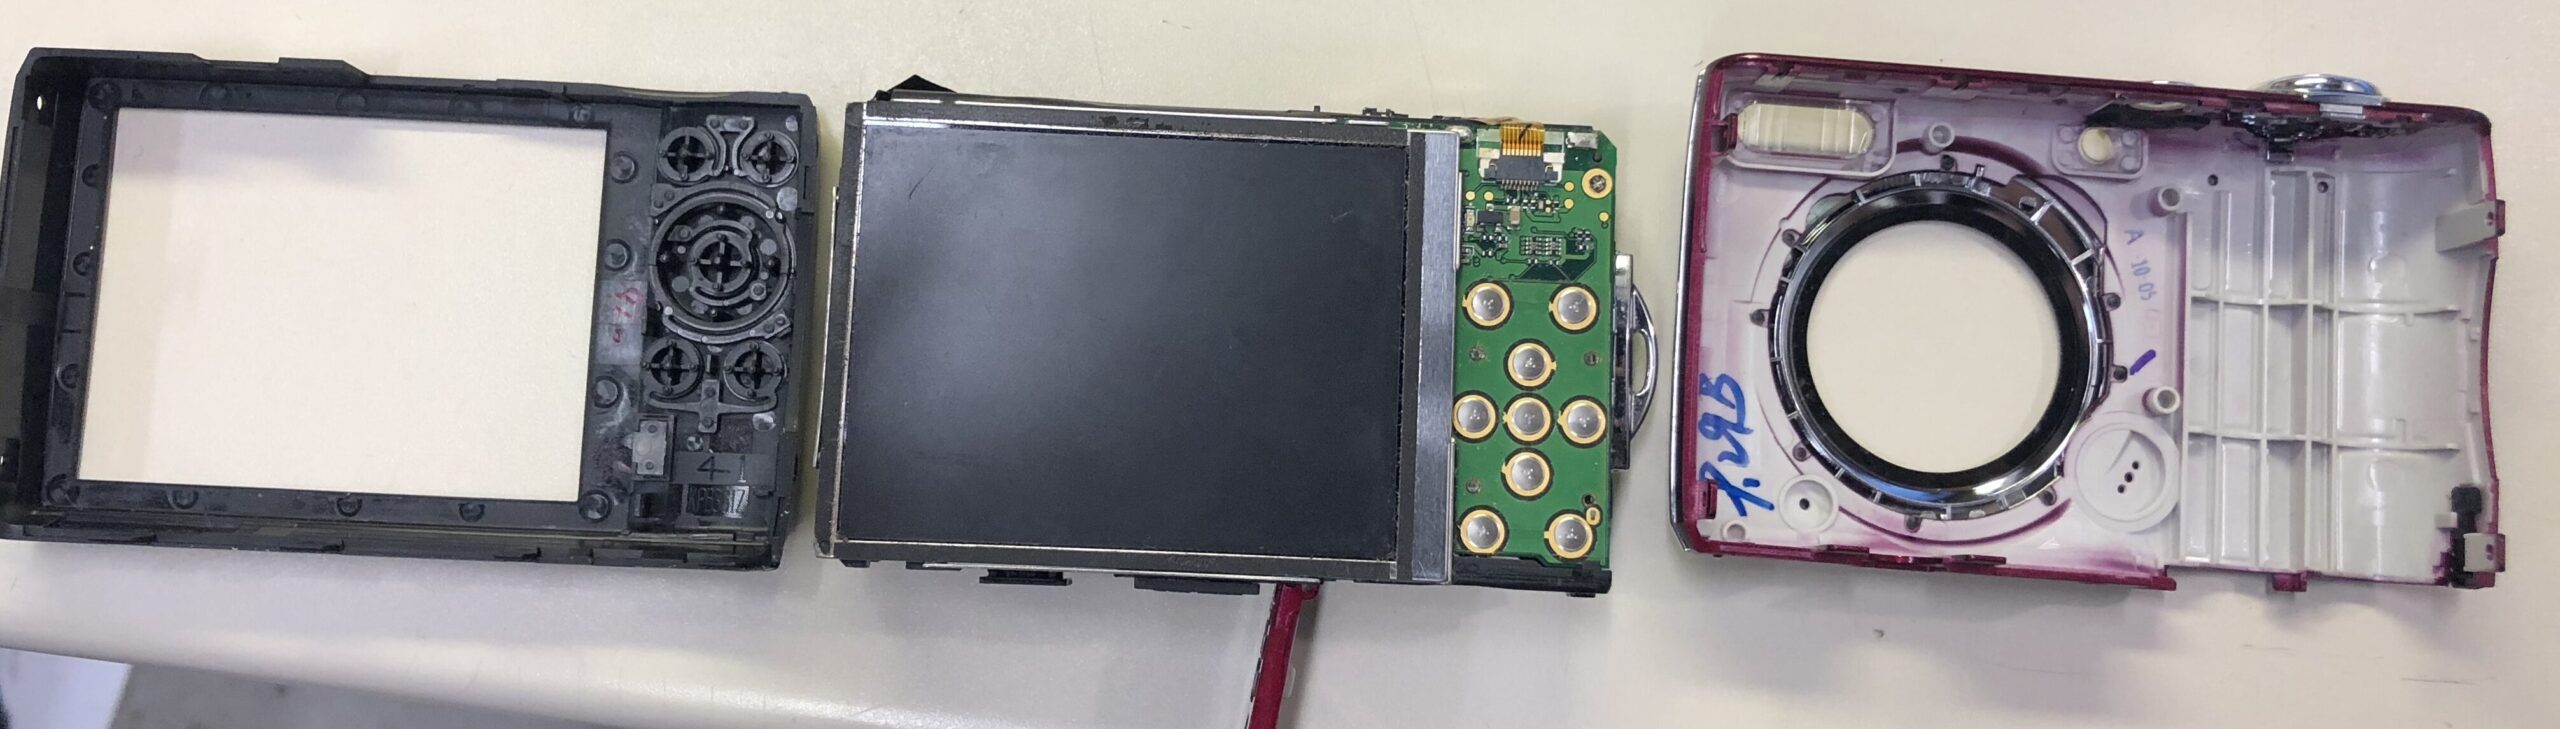
First i took the outer case off, which revealed the camera is comprised of 3 main parts, The main circuit board, the display screen, and the lens assembly. The screen is separated from the circuit board by a silver shield.

First i took the outer case off, which revealed the camera is comprised of 3 main parts, The main circuit board, the display screen, and the lens assembly. The screen is separated from the circuit board by a silver shield.
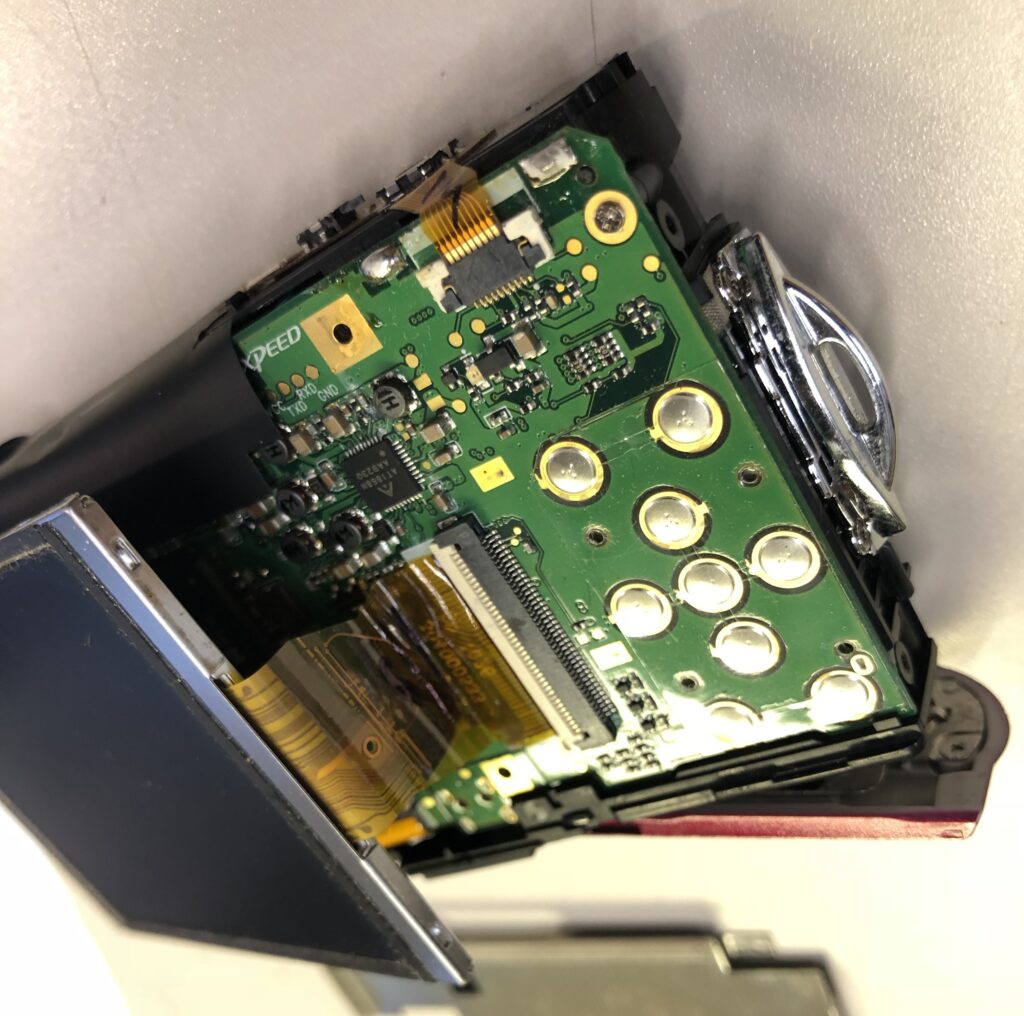

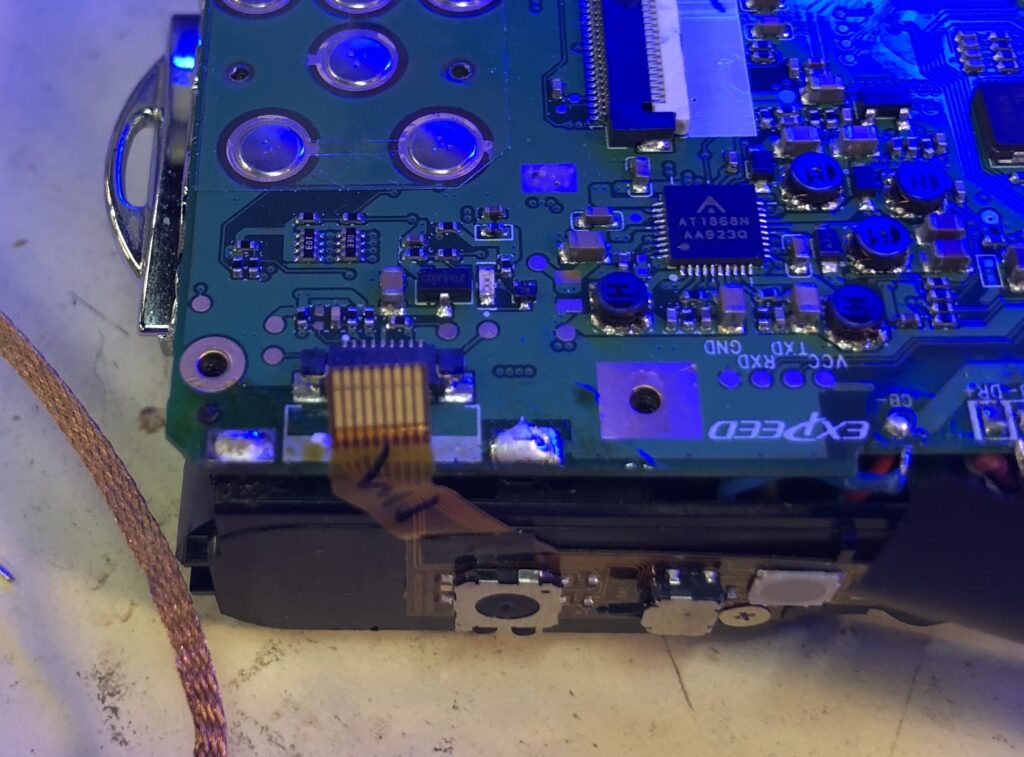
Now i can remove the mother board and flip it over to see the lens assembly. The IR filter is placed closer to the actual photo sensor than the lens.
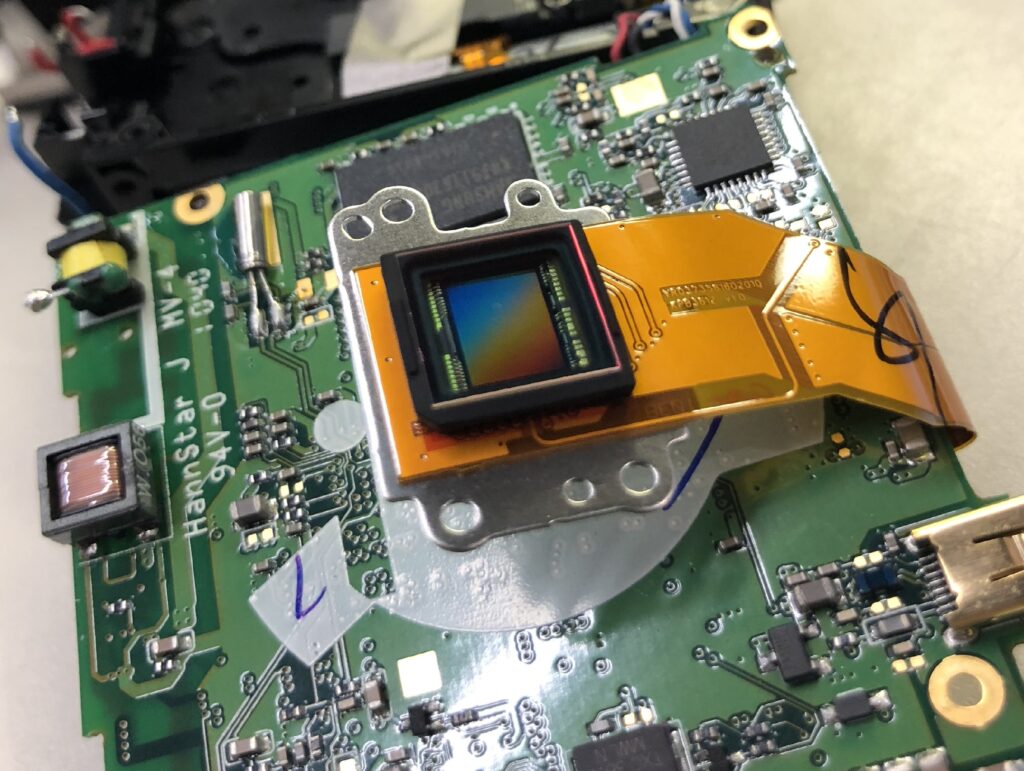

after carefully removing the IR filter, i put the camera back together. I Put fresh batteries in and pressed the power button………..Nothing. I slowly took it apart again, didnt see anything wrong, so i reflowed some solder and put it back together again. This time, i realized that there was still the small ribbon cable that i didnt connect the first time. But i thought that only connected a small light, so i didnt think that was causing the problem. But after getting the PCBs back together, I tried to power it on before putting the case back on. It turned on. haha, its so nice(and common) when the fix is simply forgetting one small thing.
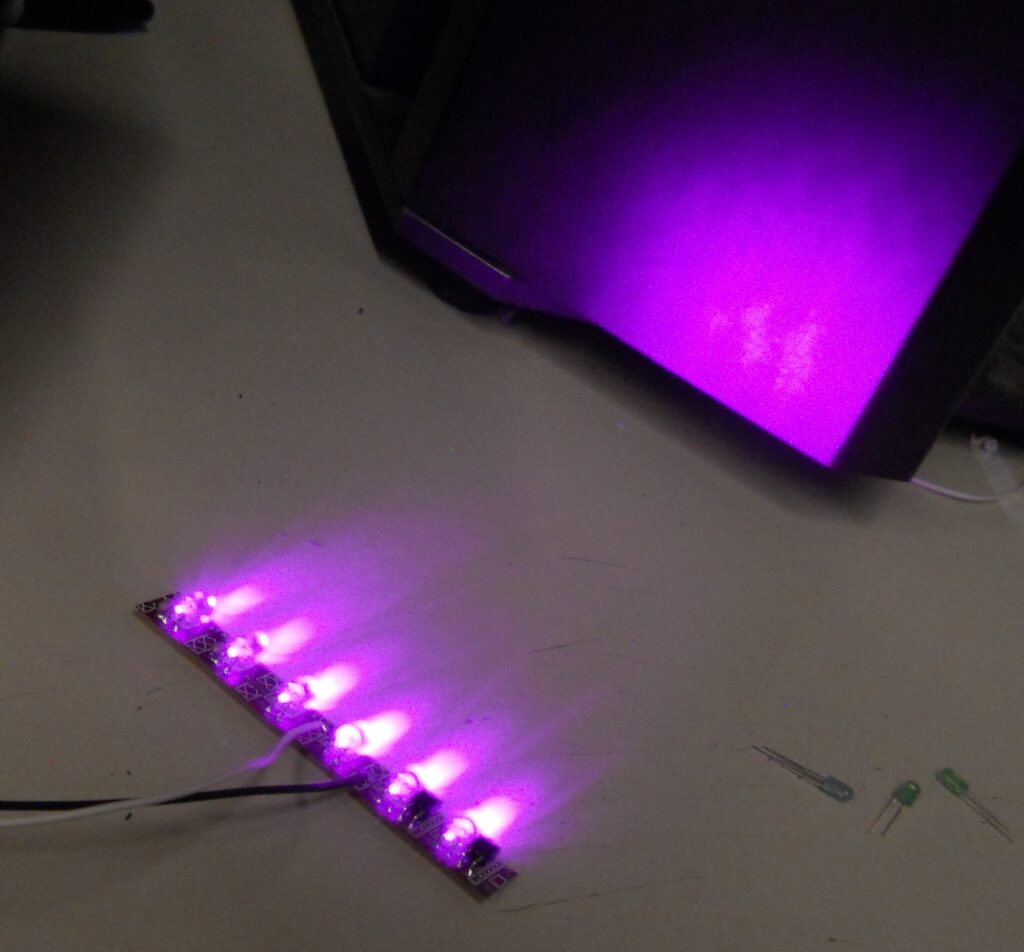
I was now ready to test if the camera would pick up Infra-red Light. I soldered up a small 6″ strip of IR LEDs. I attached them to a power supply and looked at them through the cameras display!
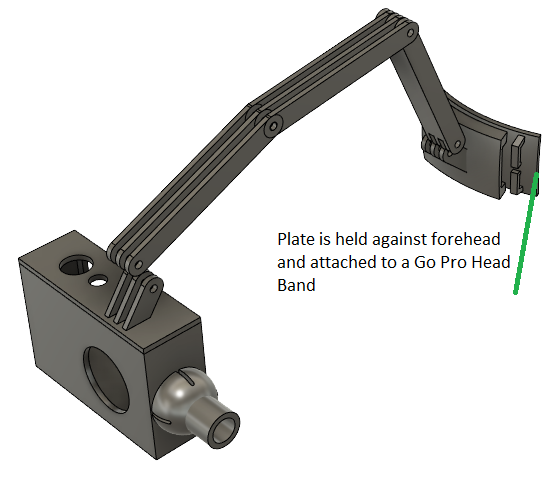
_______________________________________________________________________________________My original design was a hands-free, head mounted display. I made a rough prototype using a GoPro head mount, and realized the camera was too heavy to be comfortable or practical.
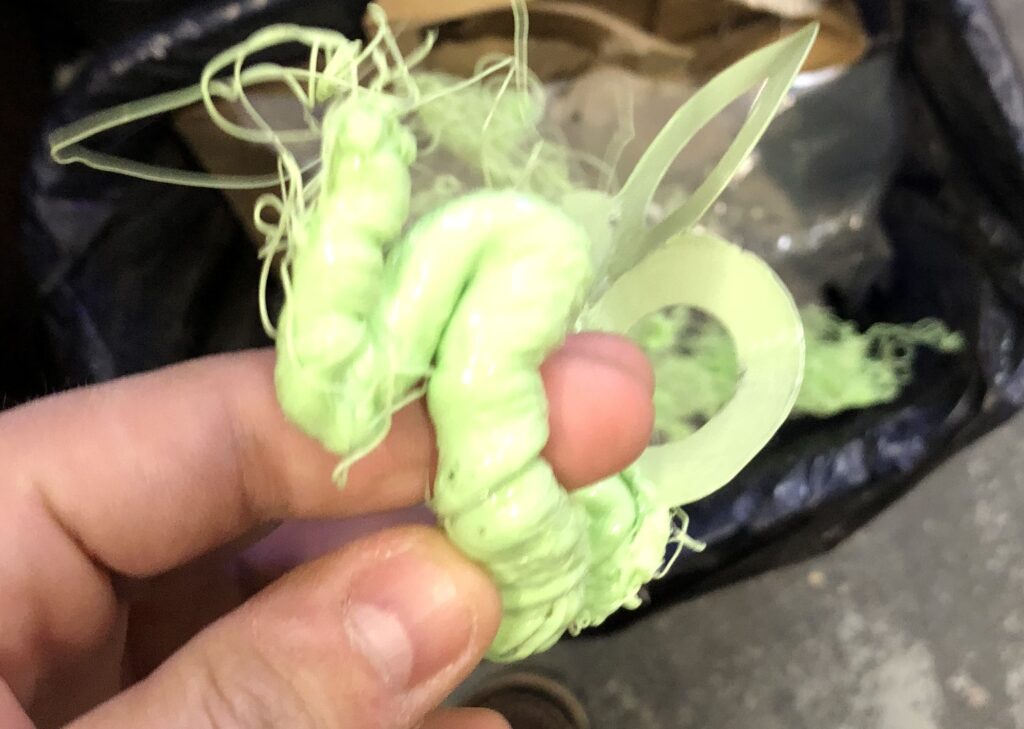
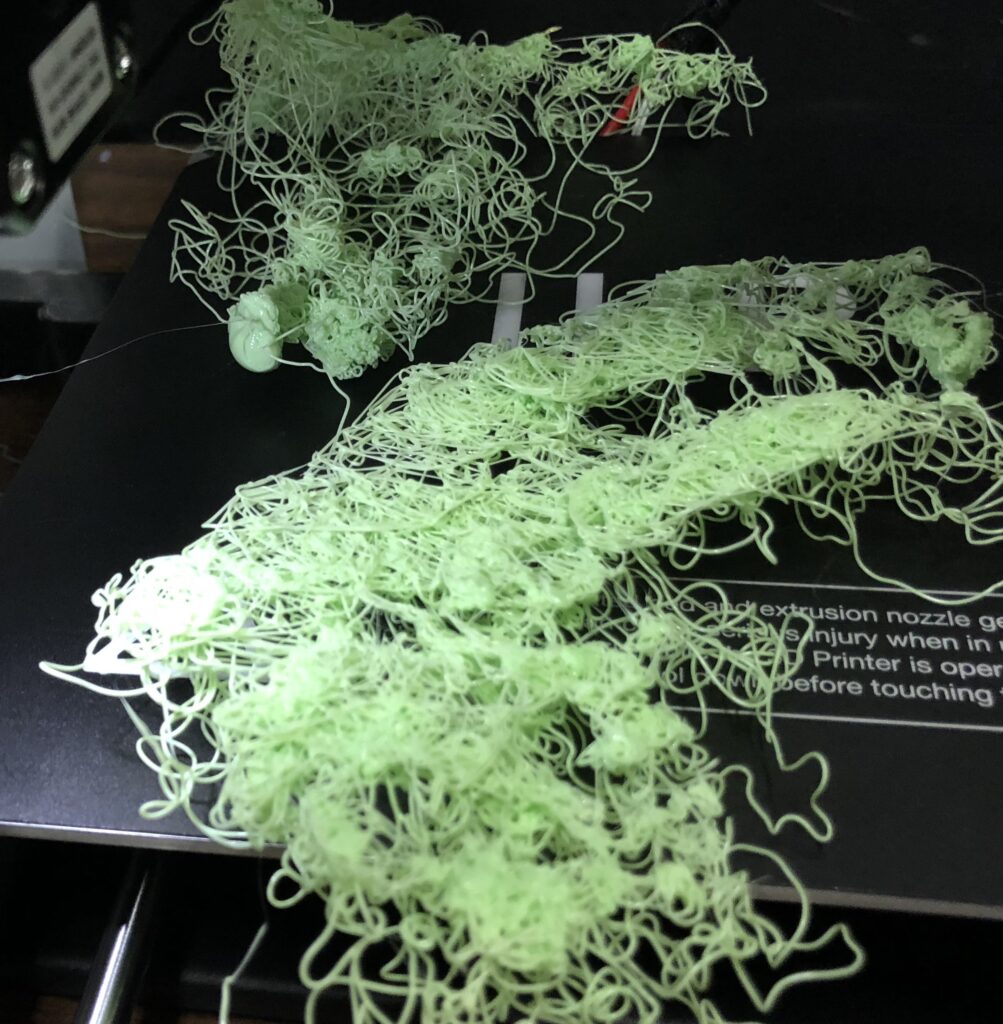
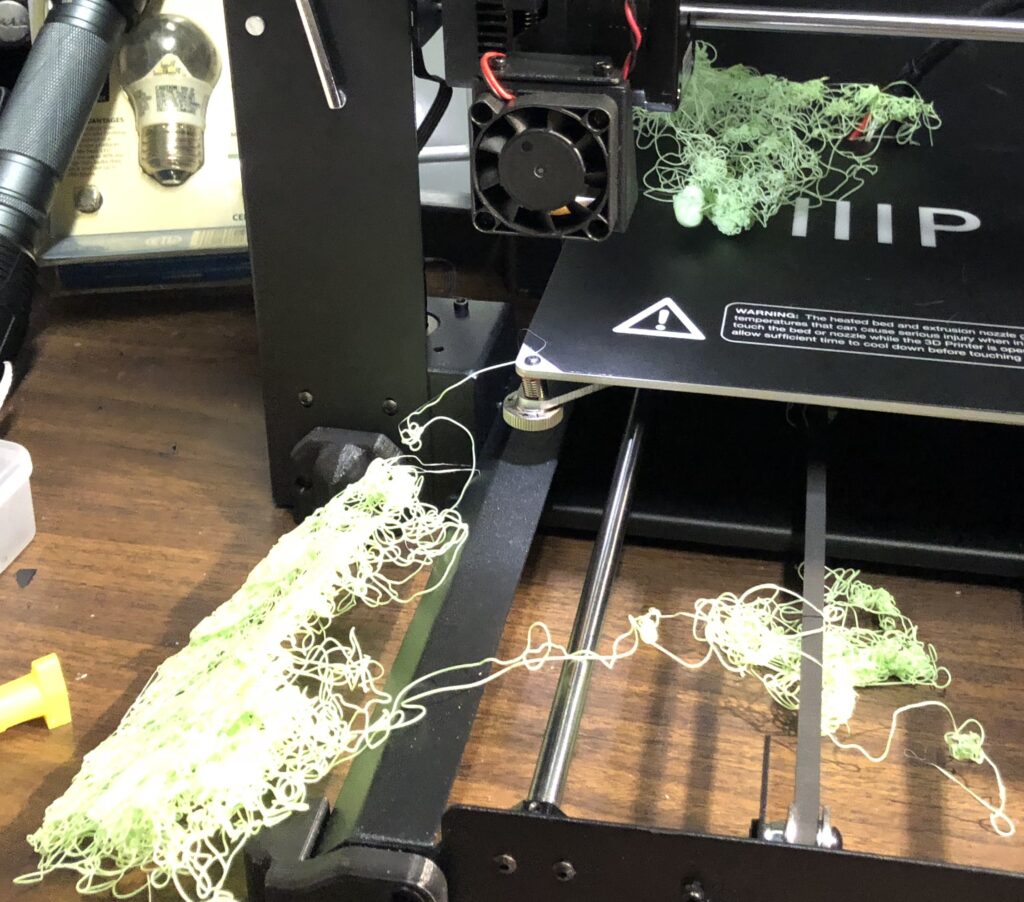
Looking back, i think my printer was trying to tell me that this was a stupid design, because these are the first 2 prints.
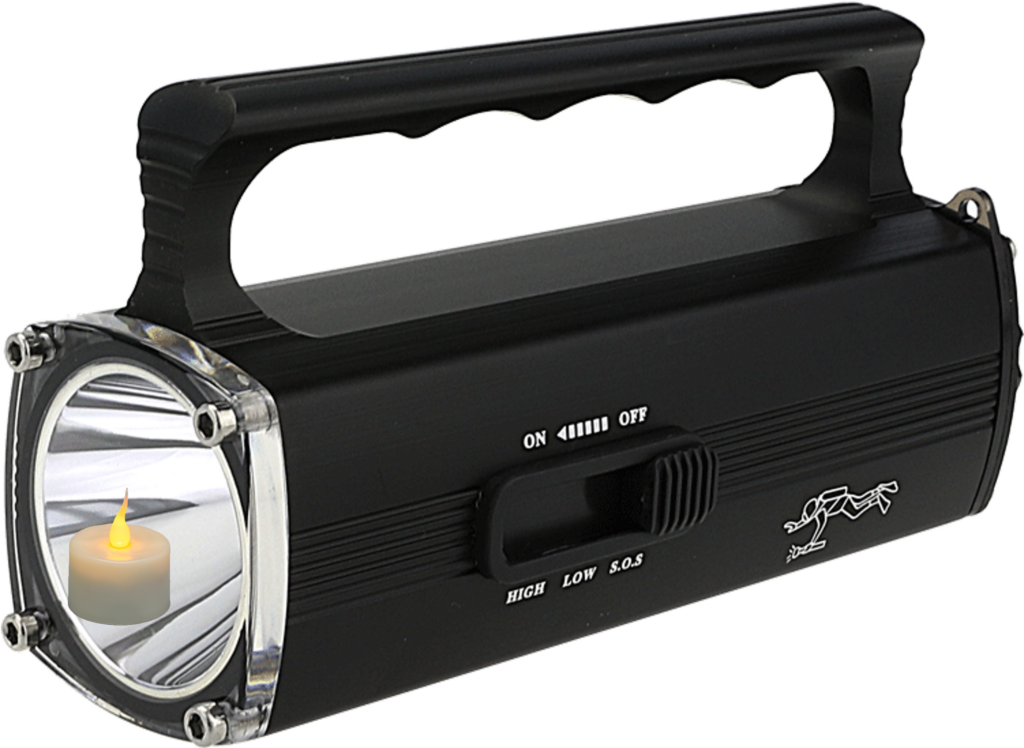
I basically had the camera and flashlight mount designed from the earlier version, so all i really needed to do was design a grip or handle for the camera mount.
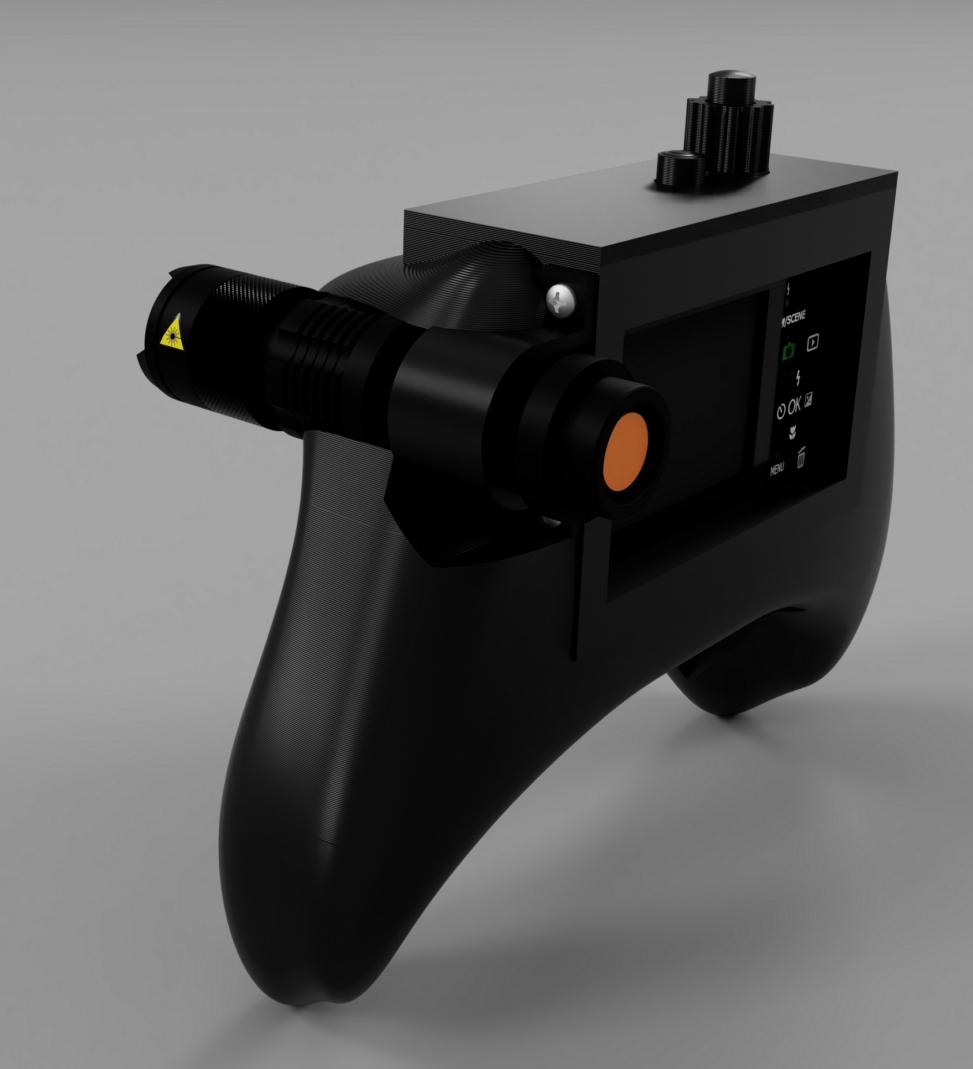
At first i was thinking i would make a stick mounted handheld device similar to FLIR cameras. Since i had also been learning about fusion 360’s surface modeling, i wanted to try modeling a smooth video game style controller.
I started by Inserting some pictures of an Xbox controller into the software so i could have some reference to “Sculpt” around. Fusion 360’s Surface Model environment is called sculpting. It lets you create initial geometries or “blobs” and manipulate them in a play-doh like fashion.
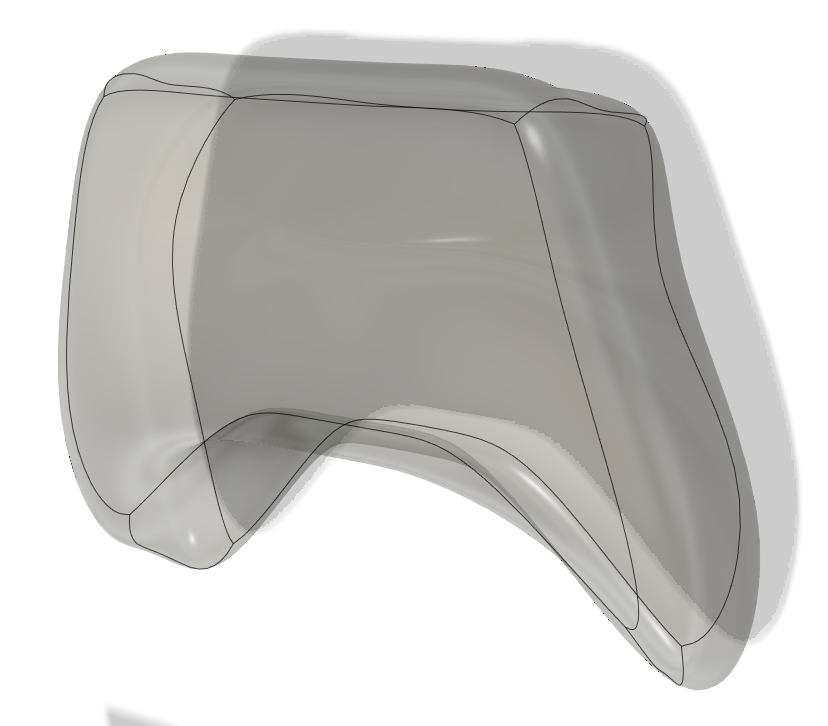
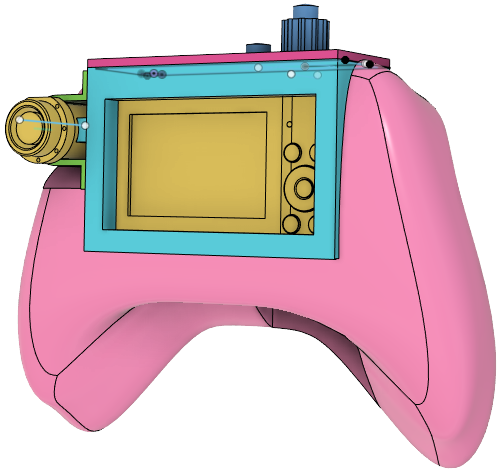
I now had a solid shape of a nice controller/ camera grip, but i still needed to mount my camera and flashlight to this grip. Since i had those modeled as well, i used them as a tool to cut the perfect shape into the controller grip. Now the smooth curves of the controller will hide the ugly boxy camera mount. Another advantage of using my camera as a tool to cut out the grip is that i also cut perfect holes for the lens of the camera to come out, as well as for the flashlight to fit through.
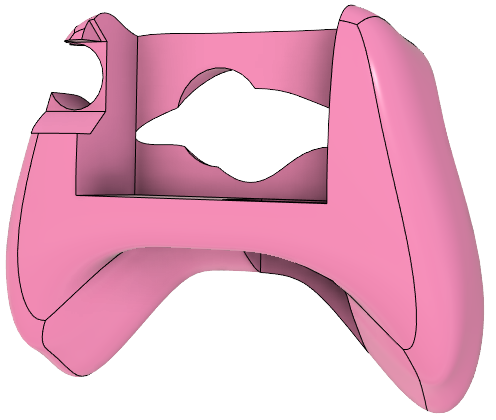
Everything now ~In Theory~ fit perfectly and was ready to be made. All of the parts are fairly straightforward to 3D print, except for the main body. The smooth organic curves of the shell leaves no flat surface to put on the print bed.
I was prepared to struggle through many failed print attempts and settings tweaks. I spent a while thinking about what orientation and what settings would be best to print this. I (novicely) considered this to be one of the hardest geometries to 3D print.
- No flat surface to build off of
- I have to add supports or brims to get more surface attached to the print bed
- i also ended up sinking the part into the bed andout half inch to increase the area of my part on the bed
- Almost completely cosmetic outer surfaces
- I don’t want support’s to leave marks
- Need to cool everything evenly so one direction doesn’t warp or sag more than others
- Greater than 90 degree Overhangs
- Another vote for supports (I did use supports, >65 degrees)
- Takes up the entire print volume and full Z height (8.0″ Cube)
- This combined with the small area bed adhesion means i have to go SUPER slow during the final layer heights.
- As the nozzle deposits fresh, hot, gooey filament to the part, there is still a slight tugging force as the nozzle pulls away.
- Also as the print gets taller and taller, not only does the mass and momentum of the part increase, but so does the height of the center of mass.
- If i don’t go extremely slow at a certain height, even the smallest tug or sudden movement could create enough torque to rip the print off the bed.
- I ended up running 20 mm/s for EVERYTHING. Even my travels. 20 was where i was comfortable with not going too fast, and the print taking forever The Point of running everything at the same speed to to minimize accelerations and risk of popping off the bed
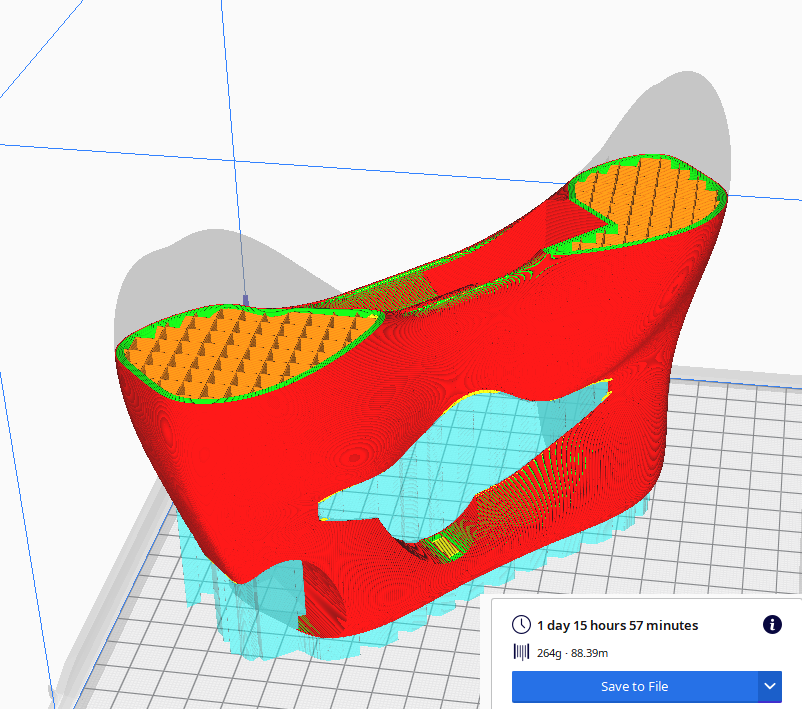
this Print is scheduled to be a 40 Hour Print! And i usually add 10% to account for reality and me slowing down/pausing the print. I remember setting up the 1st print. It was 4pm on a Tuesday. I had finished my work for the day. I started the print and watched the layers for the next 40 min or so. When everything seemed to be going well, i went home
The next day i came in, and the print appeared to be doing fine. It was only maybe 2-3 inches high, and the supports and part looked ugly, but stable. I let it run for the day and then saw it was still doing fine before i left, i was about halfway through my first print. Before leaving for the night, i debated if i should slow it down a bit to ensure i get the best results, or if i should just let it run to be sure it was finished in the morning. I figured since i know ill be making a ton more of these, ill just let it finish at this speed so i can start the next trial sooner. I was nervous and new that I would probably walk in tomorrow, to most of the part finished, but i was sure it would fail before it got to the end.
I walked in about 50 hours after the print had started, the printer was silent, i could here the idler fan spinning and the power supply fan, but no movement. Did the print fail? There’s no way its done right? I turned the corner and looked. The first thing i noticed was the print head was parked further up on the machine than i had ever seen. This means it had at least attempted to print the final layers. As my eyes move down, i can see what looks like the full complete part!
I gently tried to tug the part off the bed, and it broke away from the bed and supports almost perfectly. I couldn’t believe i was holding one solid piece in my hand. I saw some minor cosmetic defects from the supports, and where i had clipped the model to sink it into the plate, but everything felt solid and looked OK
50 hours, a quarter roll of filament, and my first attempt yielded a complete, 80% cosmetic part. I had to ask myself if this is good enough, or if i should try another print. Again, i had genuinely prepared myself for a month long battle with this and was prepared to settle with less than what i had already achieved. I decided that this was good enough.
I was ecstatic. Did I really have all the working parts for a home made night vision set? I assembles them together to see. Everything fit into where it was supposed to, albeit a little loose. The Camera fit in the case, with the buttons resting where they should, The flashlight slid into its hole. The screws held the bracket firm against the flashlight, and the zoom and power button both worked on the light.
I did have to “massage” the 3d printed buttons for them to function properly. I did so by using a lighter to heat up the parts, then slightly molding them with tweezers how i needed them. The buttons all worked great! 2 press buttons, one for power, and one for taking a picture, and a twist knob, used to zoom in and out on the camera.
This thing works better than i could have ever imagined! I can see very clearly, and even read food can labels in complete pitch black. Also, my stealth is preserved while amongst fellow humans, the brightest part of me is the screen on the camera displaying what cant be seen.
Ask me any questions you may have or share what you want to see next!